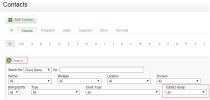
Contacts - View, Add and Edit Contacts
You can add contact groups and then organise related contacts into those groups. For example, you could create a group called ABC Pharmacy Group and add group members to it, such as ABC Pharmacy India,
Organising contacts into groups is useful for the Practice Manager module:
- A team member allocated to a job can see whether other clients could be affected by the work they have been assigned to do. This information will display on the Job Details screen.
- A payment can be split across group members when managing your receivables.
- You can get the most out of the WIP Control by Group, Grouped Aged Receivables, and Grouped WIP reports.
- Members of a group can all be put on the one invoice.
Contacts - View, Add and Edit Contacts
There are three ways to add a contact group. You can do it manually via the Contact Groups area or from within a contact record (see below). Alternatively, you can assign a contact to a contact group when you import the contact details (via the ContactGroup field).
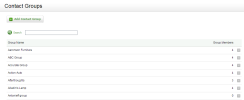
- Click Contacts > Groups.
- Click Add Contact Group to set up a new group.
- Type the Group Name.
- Click Save.
- Add a contact to the group now, if required:
- Type the first few letters of the contact's name in the Select Contact field, then click the required contact in the list that appears OR click the Search button
 , locate the required contact and click it to select it.
 - Click Add.
- Repeat the above steps to add more contacts to the group, as required.
- Type the first few letters of the contact's name in the Select Contact field, then click the required contact in the list that appears OR click the Search button
A contact can only belong to ONE group.
There are three ways to add a contact to a group. You can do it when you initially add the contact group or later on as required, via the Relationships tab in a contact's record. You can also assign a contact to a contact group when you import the contact details (via the ContactGroup field).
- Click Contacts > Groups.
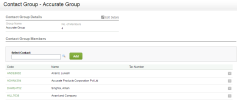
- Add a new contact group or open an existing contact group.
- Type the first few letters of the contact's name in the Select Contact field, then click the required contact in the list that appears OR click the Search button
 , locate the required contact and click it to select it.
 - Click Add.
- Click Contacts > All Contacts.
- Locate and click the required contact.
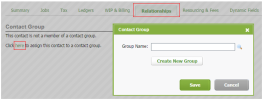
- Click the Relationships tab.
- Click "here" in the Click here to assign this contact to a contact group message.
- Type the first few letters of the contact's name in the Select Contact field, then click the required contact in the list that appears OR click the Search button
 , locate the required contact and click it to select it.
 - Click Save.
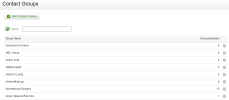
- Click Contacts > Groups.
- Click the row of the group you want to edit.
- Edit the group's name, if required:
- Click Edit Details.
- Make the required changes.
- Click Save.
- Add another contact to the group, if required.
- Remove a contact from the group, if required:
- Click the Delete button
 at the end of a row of an existing contact.
 - Click Yes to confirm.
- Click the Delete button
Contacts - Archive and Delete Contacts
- Click Contacts > Groups.
- Click the Delete button
 on the row of the group you want to delete.
 - Click Yes to confirm.

