Edit the General settings
The General settings are required to set up the integration with the electronic workpapers and your client accounting system, as well as your general firm preferences.
The workpapers integrate with all major accounting software. See Integrate with accounting software for a general overview of how integration works for each system.
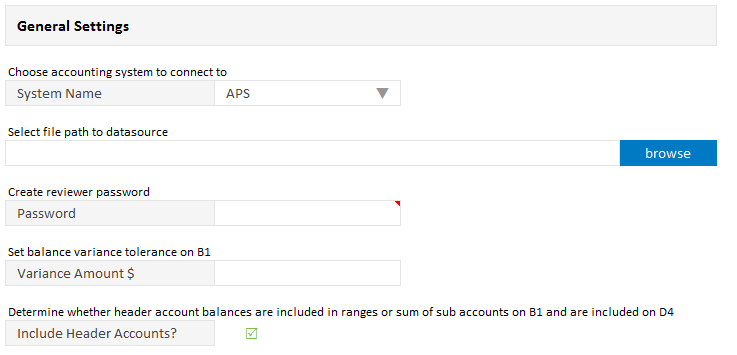
- In the Admin Setup sheet, select the accounting system the workpapers will integrate with using the drop down menu.
- If required, edit the Suffix separator and/or Range indicator to work with your GL code format:
- Suffix separator – this is the symbol that separates the suffix part of the GL code from the main part. The default symbol is “/” e.g. 200/01.
- Range indicator – this is the symbol that is used to indicate a range of codes on the B1 review summary sheet and A1 tax calculations sheet. The default symbol is “-“ e.g. 200/01-200/09. If your GL code format uses “-“ as the suffix separator, you will need to choose an alternative symbol for the range indicator.
- If applicable, select the file path to the data source (see notes for individual accounting system below):
- Click the browse button.
- Navigate to the folder where your client general ledger or trial balances will be stored.
- Select the folder and click OK.
To determine the specific action you need to take, read the note for your accounting system below :
iFirm: This step is not required. For more assistance: refer to http://help.cchifirm.co.nz/ca_workpapers_add
APS XPA: browse to the XPA client files, then browse to the lowest folder level that contains all of your client files.
MYOB AO: browse to the client folders containing general ledger data (e.g. GLMan).
MYOB AE (MAS) & MYOB AE (Common Ledger): browse to the folder that your team will download the trial balance reports to.
Xero API, MYOB AO (Common Ledger), Reckon One: This step is not required.
Xero [not using API]: browse to the folder that your team will download the trial balance to. -
For MYOB AO (Common Ledger) , enter the name of your sql server instance / DSN information and the database name. See MYOB AO Common Ledger Setup for detailed instructions.
- Set your firm's standard variance amount (dollars). This allows accounts to appear as reconciled on the B1 Review Summary, if the balance variance is within the range set.
- Select whether Header Account balances are included when summing up a range of GL account balances (i.e. if the header account contains and sum of the sub account balances, this option should be unchecked.
- If required, show the Custom Validation Points sheet to add validation points that are specific to your firm. Remember to un-check this option again before releasing the workpapers to your team.